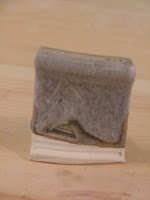
Glaze testing is done and I could not be happier. I did not have any total fails on new glazes or glaze combinations. The results I am most happy with are the base glazes themselves, although some of the combinations are great. I forgot to share in the first post that I am testing 6 semi-matte glazes (out of eight) with two glossy.The reason I mention this is with my old kiln I could not make my matte glazes matte. When firing at ^6 oxidation (pretty much in layman's terms means mid fired electric kiln in this case) getting a glaze to become matte can be tricky. Glossy is a usual outcome without some planning. You see to make a glaze matte, you are in fact growing crystals in the glaze to create a non-glossy texture. Of course you need to find or develop the proper glaze chemistry to promote these crystals to grow with in the parameters of your firing, in my case ^6 oxidation. Not only this you need to hold (soak) the temperature where those crystals like to grow. When my old kiln reached its temp, it just shut off. This will make a matte glaze glossy. The new computerized kiln solves this issue.
Real quick for the non potters out there. I bet you often read, hear, or are told that the pottery has been fired to cone 6 (^6) . Or its high fired in reduction to cone 10. What we potters are trying to say to you (acting all vocational...and enjoying the sound of our own terms) is this.

Cones or rather pyrometric cones are made from mixtures of ceramic materials formed into triangular elongated pyramids,and designed to melt and bend over or "squat" at a given temperature. The picture shows the melted cones. My old kiln in fact would shut off by a mini cone melting and causing the opening of a switch therefore shutting off the kiln. The number represents the temp. Cone 6 is 2237 . Oxidation means oxygen is present during the firing (real vague definition. Reduction is the extraction of oxygen from the firing. this is done to change the chemistry of glazes. You get some fairly dramatic changes with iron and copper. We use cones to know when the kiln reaches temp. In my case I use them to make sure the computer is running correctly and what the temps are in different parts of the kiln.
Back to the glazes.
Before/After


Pretty cool? Right?
Here is the list 1-8. 1. Hobbit blue (one of my older glossy glazes). 2 Spearmint (semi-matte from "Mastering Cone 6 Glazes"). 3 Bone (also semi-matte from "Mastering...4 Variegated Slate Blue( Semi-matte from "mastering...5 Fieldmouse (Semi-matte from "Mastering...6 Oatmeal (Semi-matte from "Mastering...7 Jan's Red (a glaze from my teacher years ago. More on the glossy side. This is an old classic).8 Raw Sienna (semi-matte from Mastering).
Here they are below of two clay bodies. B-Mix 5 and #90.
B-Mix5 Glazes 1-8

#90 Glazes 1-8
 And here are a few layers I liked:
Bone over Fieldmouse.

Bone over Raw Sienna

Variegated Slate Blue over Raw Sienna

Fieldmouse over Spearmint

I could keep going. Most worked and there where more surprises but this post is plenty long already. . A few are similar to each other as you can see on the chart. I cannot wait to get these on some pots. After this post I am going to use the spearmint on the tumblers i recently fired.
Most of these glaze recipes (except the Hobbit Blue and , Jan's Red Brown) came from the book mastering cone 6 Glazes. This book came out while I was working at a ceramic supply company. It really explores what makes a truly stable glaze at cone 6. Also come with a few base glazes to work with. It expains the basics and will take you all the way into diatometer measurements if you so desire.
Well off to the studio. I'll put up some of the pots with the new glazes when i get some fired.
Take it easy
 ~TPS~
~TPS~


 ~TPS
~TPS